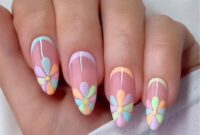
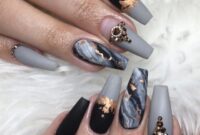
Elevate your style with vibrant tie dye gel nail designs. Explore trendy and colorful nail art ideas that make a statement. Transform your nails into a canvas of creativity with these stunning designs.
Tie Dye Gel Nail Designs: A Trendy and Creative Nail Art
When it comes to expressing our individuality and creativity, nail art has become an increasingly popular way to make a statement. One of the most exciting and vibrant trends in recent years is tie dye gel nail designs. This unique and eye-catching style allows you to unleash your artistic side while adding a pop of color to your fingertips. In this article, we will explore the mesmerizing world of tie dye gel nail designs, providing you with inspiration and tips to achieve this trendy look.
The Art of Tie Dye Gel Nails
Tie dye gel nail designs combine the nostalgia of tie dye patterns with the durability and longevity of gel nails. Unlike traditional nail polish, gel nail polish is cured under a UV or LED lamp, resulting in a chip-resistant and long-lasting finish. This makes it the perfect choice for those who want their tie dye designs to last for weeks without losing their vibrant appeal.
Creating Stunning Tie Dye Gel Nails
To achieve stunning tie dye gel nails, you don’t need to be a professional nail artist. With a few simple steps and the right tools, you can create a mesmerizing tie dye pattern at home. Here’s how:
Step 1: Prepare Your Nails
Start by prepping your nails. Remove any old nail polish and shape your nails to your desired length and style. Push back your cuticles gently and buff the surface of your nails to create a smooth canvas for the gel polish.
Step 2: Gather Your Supplies
To create tie dye gel nails, you will need gel nail polish in various vibrant colors, a base coat, a top coat, a UV or LED lamp, a nail art brush, and alcohol or gel cleanser for cleaning up any mistakes.
Step 3: Apply a Base Coat
Apply a thin layer of base coat to your nails and cure it under the UV or LED lamp according to the manufacturer’s instructions. This will create a strong foundation for your tie dye design and protect your natural nails.
Step 4: Create the Tie Dye Effect
Now comes the fun part! Start by selecting your desired gel polish colors. Using the nail art brush, apply small dots or random strokes of different colors onto your nails. There’s no right or wrong way to do this; let your creativity guide you. Be sure to leave some spaces between colors for a more authentic tie dye effect.
Step 5: Swirl and Blend
Using a clean nail art brush or a toothpick, gently swirl and blend the colors together to create a tie dye effect. Don’t overdo it; a few gentle strokes will suffice. Remember, the beauty of tie dye lies in its organic and imperfect patterns.
Step 6: Cure and Seal
Cure your tie dye design under the UV or LED lamp according to the gel polish’s instructions. Once cured, apply a layer of top coat to seal the design and give your nails a glossy finish. Cure again under the lamp to ensure longevity.
Step 7: Clean Up
Use a brush dipped in alcohol or gel cleanser to clean up any excess polish around your nails and cuticles. This will give your tie dye gel nails a professional and polished look.
Step 8: Moisturize
Finish off by moisturizing your hands and cuticles with a nourishing oil or lotion. This will help keep your nails and surrounding skin healthy and hydrated.
The Best Tie Dye Gel Nail Designs
Rainbow Dots Pedicure

Galaxy Pedicure
Water Marble Pedicure
Pastel Swirl Pedicure

Gradient Pedicure

Citrus Pedicure
Mermaid Pedicure

Tie-Dye French Tips Pedicure
FAQs About Tie Dye Gel Nail Designs
1. How long do tie dye gel nails last?
Tie dye gel nails can last for up to three weeks with proper care and maintenance. Remember to wear gloves when doing household chores and avoid using your nails as tools to prevent premature chipping.
2. Can I use regular nail polish for tie dye designs?
While regular nail polish can be used, gel polish is recommended for tie dye designs due to its longevity and chip-resistant properties. Gel polish also allows for better blending and swirling of colors.
3. Can I achieve tie dye gel nails on natural nails?
Absolutely! Tie dye gel nails can be applied to both natural nails and nail extensions. However, it’s important to ensure your natural nails are healthy and well-maintained before applying gel polish.
4. How can I avoid smudging the tie dye design?
To avoid smudging your tie dye design, ensure each layer of gel polish is properly cured under the UV or LED lamp before proceeding to the next step. This will ensure the colors remain vibrant and distinct.
5. Can I remove tie dye gel nails at home?
While it’s possible to remove tie dye gel nails at home, it’s recommended to visit a professional nail salon to ensure proper removal without damaging your natural nails. A nail technician will use the appropriate techniques and products to safely dissolve and remove the gel polish.
In Conclusion
Tie dye gel nail designs offer a unique and captivating way to express your creativity. With the right tools and techniques, you can achieve stunning tie dye patterns that will turn heads and showcase your individual style. Whether you’re a nail art enthusiast or simply looking to try something new, tie dye gel nails are a trendy and exciting choice. So, unleash your inner artist and let your nails become a canvas for vibrant and mesmerizing tie dye creations!


